Friday, October 22, 2010

Apple Pie and Corn Soup

As I was cleaning out the fridge the other day I noticed I had some apples that were about to go bad.  What was I to do?  Well my first thought was to put them in the composter, but then I thought, why not make a pie?  Especially because my husband loves pie, and wishes I made more of it. 

My go to recipe for pie crust is Martha Stewart's Pate Brisee, and  I use it whenever I need a pie crust. It is super easy to make, and even though the directions say to use the food processor, I just make it by hand. It seems to work out just fine. 

I wasn't sure what to do for the filing, so I just typed apple pie into Google to see what would pop up.  I found this apple pie recipe on All Recipes.  I like this site as there are reviews of the recipes on the bottom so you can get an idea if the recipe is going to be good or not.  So far I have had good success with the site!  I did make one modification to the recipe. That is I only had 6 apples, instead of 8, and only 3 were granny smith. When I was done filling the pie, I was happy I only used 6 as anymore would have been overkill.  It also felt kinda weird to put the apples in the pie, put the top lattice on, and then fill it up with the sauce.  Oh well, it did turn out tasty!
I love the stars!
So many apples, yummy!
Another thing that my husband quite often asks for is corn for dinner.  I thought I would try to be somewhat creative and make corn soup for dinner instead of just a bowl of corn. Again I like going to Martha Stewart's website and used her Corn Soup with Fresh Tomatoes.  The soup was delicious, and I really liked the tomatoes on top.  However my husband was not such a fan of the tomatoes, but loved the soup. (The tomatoes I used was from our garden). The recipe did call for fresh corn, but I just use frozen.  Good enough for me.
So Good!

Saturday, October 16, 2010

Spooktacular Cupcakes!

On Friday I took another decorating class, and this time it was for Halloween cupcakes.  It was just for one evening, but it was lots of fun.  I find that taking the classes gets me more motivated to make things then I get when on my own.  I am also planing on taking a few more classes next month.  We will see how that turns out.

This is what I made:
I think that they turned out great.  This shows that there are so many ways to decorate cupcakes, all it takes is imagination. 
Here are my top three faves:

The Mummy .... So Cute
The Werewolf ....  Scary
The Grave... Love the hand coming out

Thursday, October 14, 2010

iPad Case

We bought the iPad way back when it first came out in Canada but we never got a case for it.  Well I felt it was about time that we got a case so it's easier to take around and to protect it. Of course buying a pre-made case is not nearly as much fun as making my own, so to the fabric store I went.  I love the idea of a neutral colour on the outside and a big pop of colour on the inside, so I went with a gray corduroy for the outside, and a bright pink fleece for the inside.  Also I wanted all the seams to be in pink so there would be that additional pop of colour. 


This is how I did it:

Materials:
1 binder
0.5 m  each of outer fabric and lining
2 buttons
thread

First take the binder and cut two 8.5 x 11 inch pieces. (This makes the case sturdy and have more support)
two cut binder pieces

Cut the fabric as follows:
Cut two each of the outer and lining fabric in the size of 13.5 x 11 inches. (These are the outside pieces)
Cut one of the outer and lining fabric in the size of  13.5 x 9 inches. (These are for the pocket)
Cut one of the outer and lining fabric in the size of 13.5 x 8.5 inches. (These are for the flap)
Cut peices
Take the pocket fabric and place the wrong sides together (outer fabric and lining).  Sew across the top (13.5 inch side).  Turn the fabric so the wrong sides are together.  Press.  Top stich along the new seam, and another below it (I did seams of 1/4 inch and 1/2 inch)
This should be what it looks like
Place the pocket right side up on one piece of the outside fabric(13.5 x 11 inch), also facing up.  Then place the right side of the lining on top, so that right sides are facing.

Now sew a seam along the two sides and the bottom.  Turn the fabric inside out, don't forget to clip the corners so they turn easier.  This will be the front panel.

Take the last outside pieces (13.5 x 11 inch) and place the right sides together.  Sew along the two sides and bottom.  Turn inside out, remember to cut the corners to turn better) This is the back panel.
Do the same for the flap piece.  Place the right sides together, sew along the 3 sides, turn inside out. 
This is what you should have (I took the plastic of the binder pieces)
At this point I made my button holes int the top flap.  This doesn't need to be done at this point, but this is when I did it.
Now take one of the binder pieces and put into the panel with the pocket.  This part is a bit tricky, but pin the binder into the middle of this piece.  This is to make sure that you don't sew over the binder.  Now turn in the open seam and press in place. 
Sew along the top seam.  Again I did a 1/4 inch and 1/2 inch seam allowance. 
Now put the other binder piece in the non-pocket piece, and pin into place just like above.  Again turn in the seams and press.  Again tricky, place the top flap inside the opening and pin into place.  Sew along the seam where the flap and the back piece meet.  I did the two seams again.
Inside pinned together
Outside pinned together
Now that these two pieces are sewing together, place the back piece with the flap lining side up and the pocket piece lining side down.  Sew along the three sides, take out the pins.  Sew the buttons into place, and it is now complete!!
The finished case
Inside of case
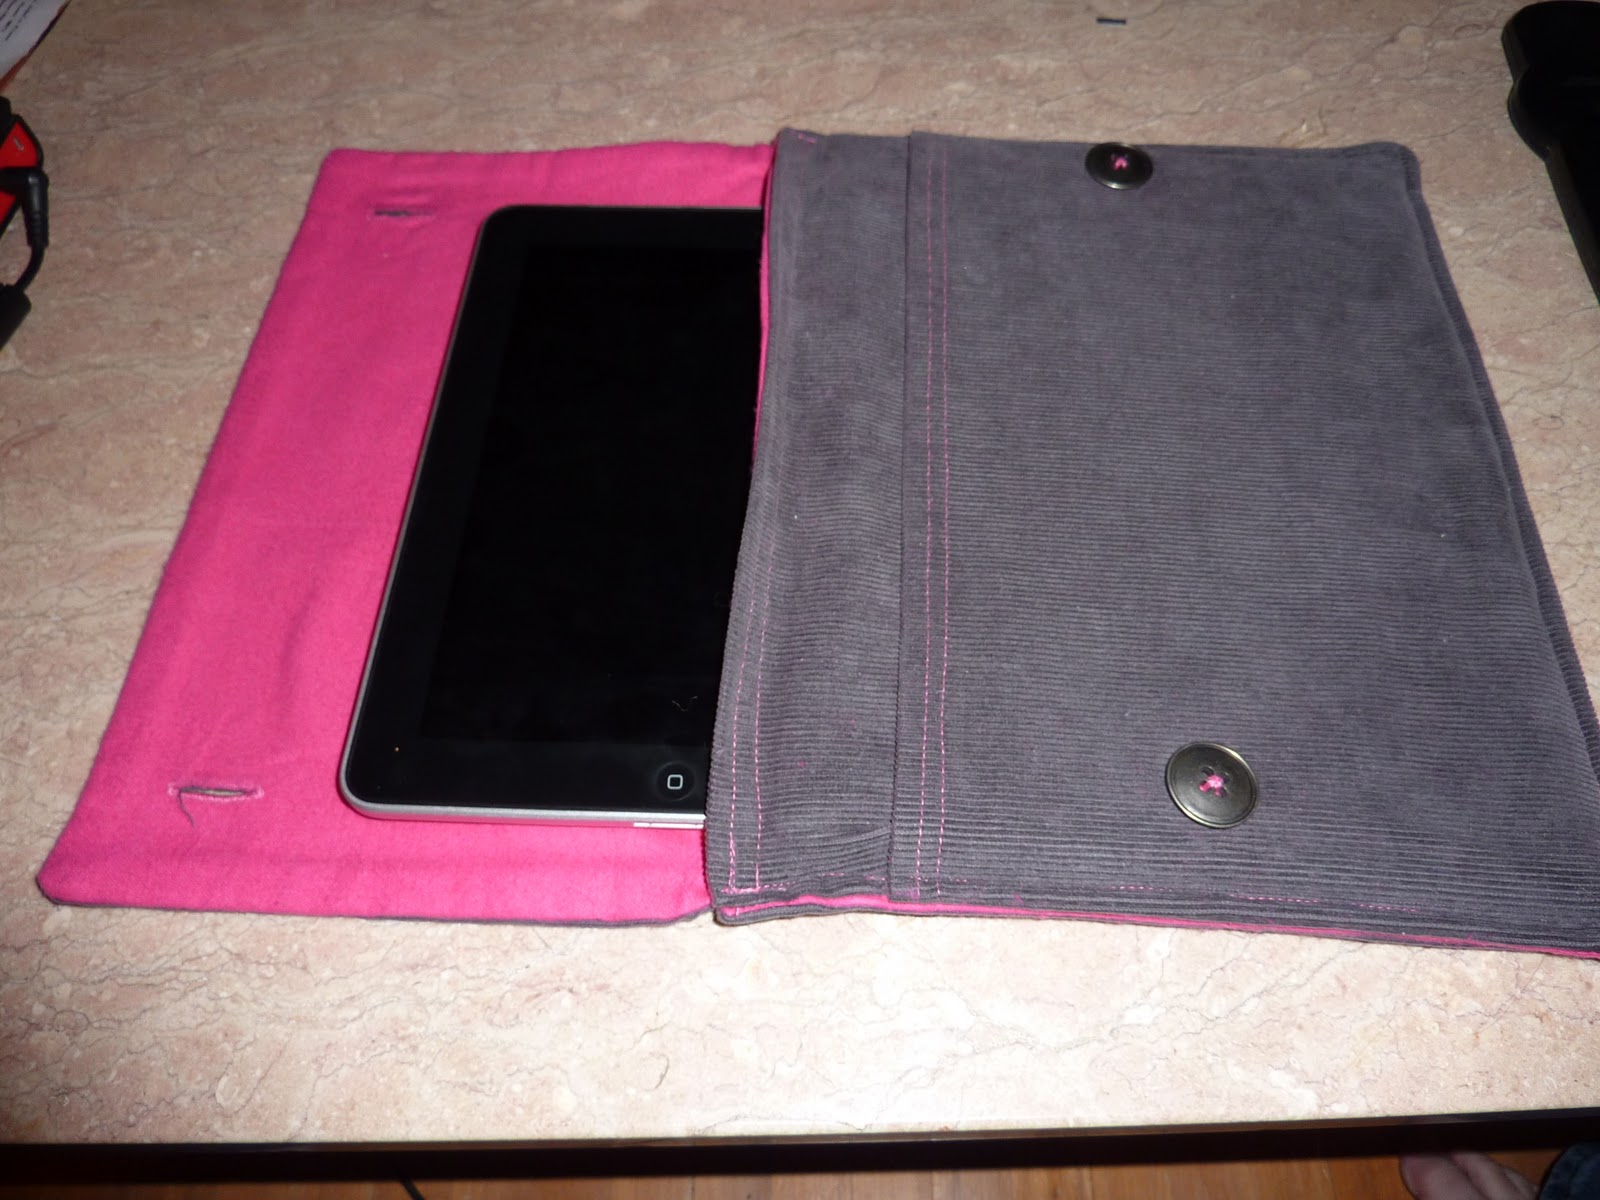
iPad sitting comfortably
This is my first pattern I made myself.  It turned out quite well, and I like how putting the iPad in and out of the case cleans the screen!


(Please use pattern for personal uses only)

Sunday, October 10, 2010

Happy Thanksgiving!

Hope everyone is having a good Thanksgiving weekend!  This year for Thanksgiving desert I made Pumpkin Cake with Brown butter icing from Martha Stewart.  I have made this cake before and it is so good.  It is really moist and tasty.  The icing is really easy to make, and probably one of my favorites.  I am always impressed by how well the caramelized walnuts turn out, although I used pecans this time as they did not seem to have walnuts at the store.  
Pumpkin Cake with Brown Butter Icing
Side view, so yummy!

Crobots - Retrobot

I have finished Retrobot, which is also the last of the "easy" crobots to do.  (They are rated on a scale of one cogwheel to four, one being the easiest)  I didn't have the valves to put on for the arms, but I used some screws in place of them.  I am starting to find, the more I do of the crobots, the easier they seem to be.  I guess it is true, practice makes perfect!
Retrobot

Phoebe and Retrobot, taking a break

Tuesday, October 5, 2010

Crobots - Zombiebot & Mechanobot

I have completed a couple more crobots.  The one I was most looking forward to making was Zombiebot and it turned out great.  I especially love the arm falling off.  It took me a while to finish making him as I needed to get a hold of some screws and more springs.  For the screws I went to the MCC thrift shop and got a bag of miscellaneous screws and nails for only 50 cents. Woo Hoo!   For the springs I went to the dollar store and got a bag of pens with springs, as I was tired of looking around my house for pens I could tear apart. I think they both turned out really great.

Zombiebot
Zombiebot sneaking up on Phoebe......On No!!!!
Mechanobot
Phoebe shocked by Mechanobot's awesomeness!


**No cats were zombiefied in the making of this blog**